
Bills Payment
The Bills Payment module is used to settle your outstanding Accounts Payable. This is the final step where you select which vouchers to pay and manage your check issuances.
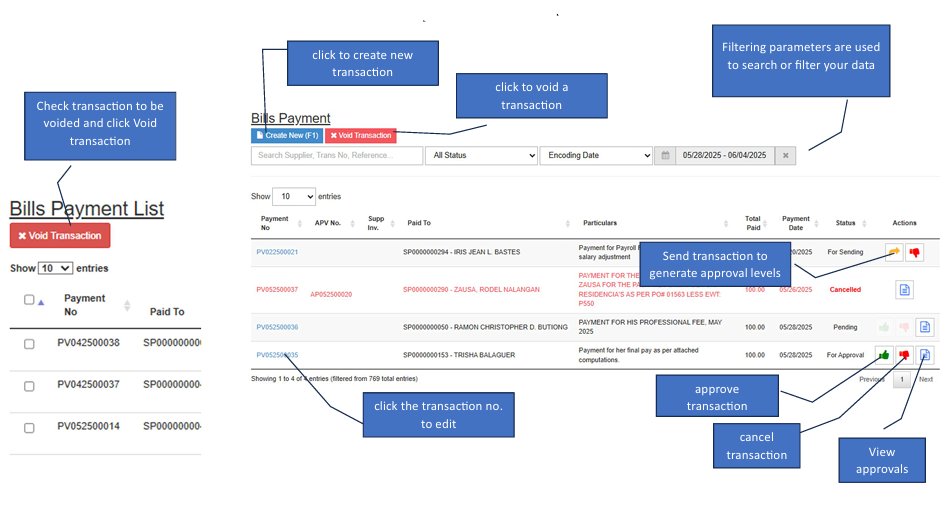
How to Create a New Transaction
Start the Payment:
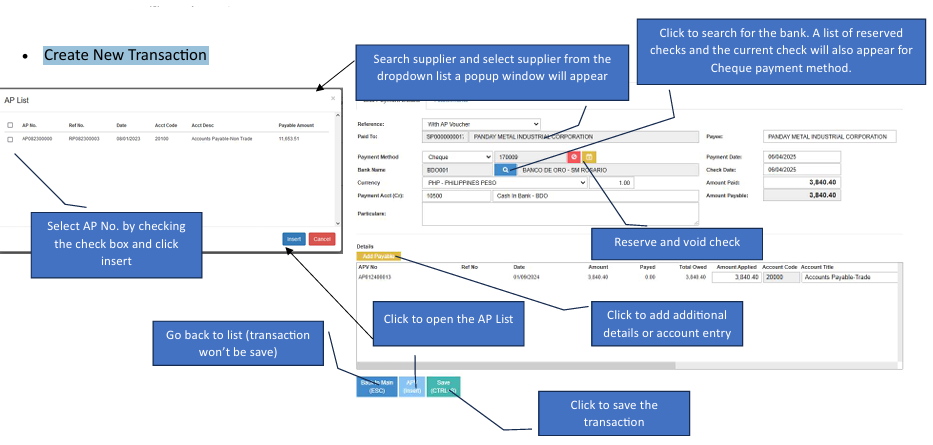
Click the Create New button to open a new form.Select Supplier:
Search for and select the Supplier from the dropdown list.Select Vouchers (AP List):
A pop-up window will appear automatically. Check the box for the specific AP No. (Voucher) you wish to pay, then click the Insert button.Choose Payment Bank:
Click the Blue Search button to select the source bank account. For cheque payments, this will also display your current and reserved check numbers.Manage Checks (Optional):
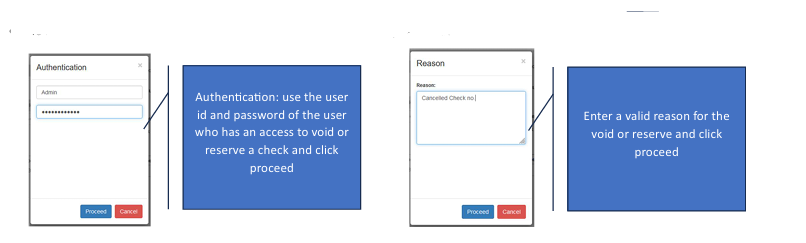
If you need to reserve or void a specific check number, click the Red Button (Reserve/Void Check). Enter the User ID and Password of an authorized staff member, provide a valid reason, then click Proceed.Add Manual Entries:
If additional details or manual accounting entries are needed, click the Add Line button in the details section.Save:
Review your totals and click the Save button to finalize the payment.
How to Edit a Transaction
Enter Edit Mode:
Click the Edit button to unlock the fields of an existing payment.Modify Details:
Update the payment date or add more vouchers as needed.Save or Cancel:
Click Save to apply changes while in editing mode, or click Undo Edit to cancel and exit without saving.Review Accounting:
After saving, click the Accounting Entry button to view the journal entries generated for this payment.
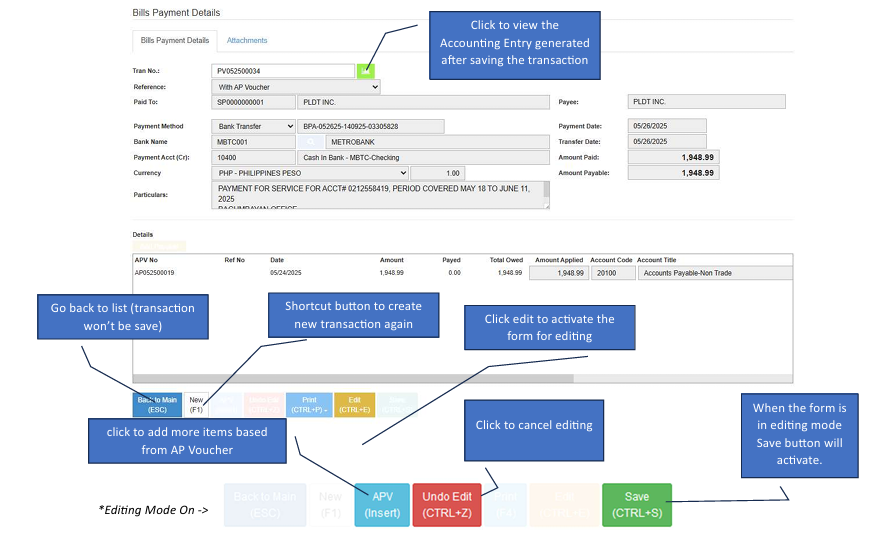
Navigation Shortcuts
Back to Main: Click to return to the list view without saving your work.
New Button: Use this to immediately start another payment transaction without returning to the dashboard.